How to FEED a POWER-HUNGRY Off-Grid Minivan Camper!

If you've been following my adventures, you know I’ve turned my minivan into a camper on steroids. Seriously, this thing is loaded with gadgets, appliances, and enough tech to rival a tiny home. From an air fryer to a CPAP machine, a portable fridge/freezer, and even Starlink for internet, my van is a power-hungry beast.
Today, I want to walk you through how I keep everything running smoothly, even when I’m out in the middle of nowhere.
Links to products, devices and gear featured in this video
Going Off the Grid: How I Power My Tech-Hungry Minivan
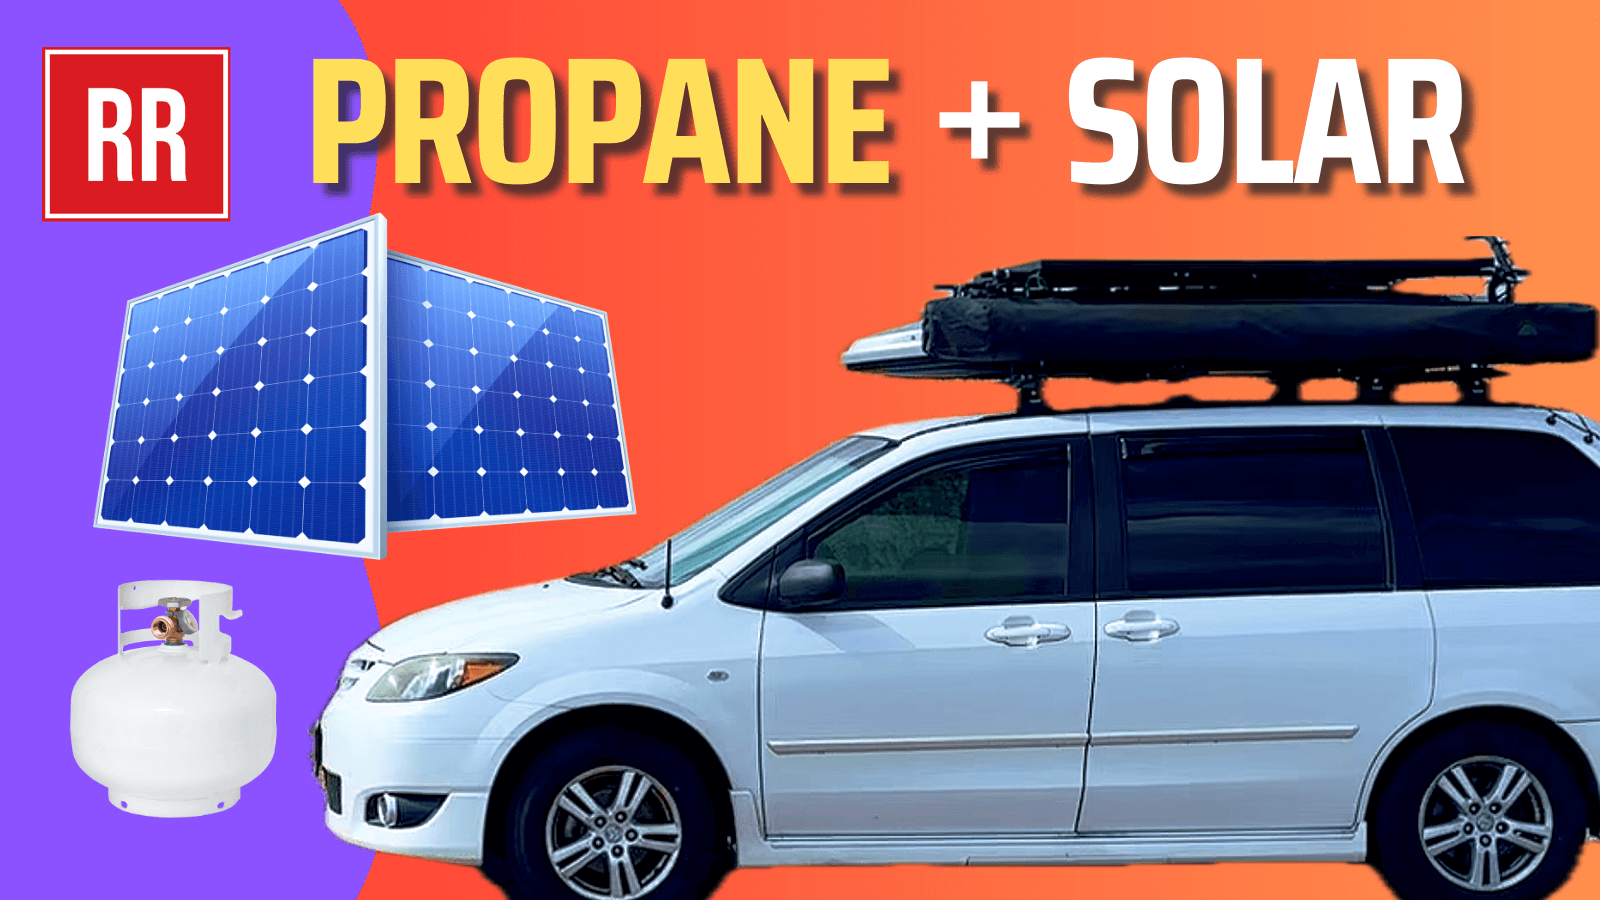
I’ve got options—lots of them. Inside the van, I rely on 2.7 kWh of lithium battery storage paired with a Renogy 1,000-watt inverter/backup charger. On the outside, I’ve installed 300 watts of solar and keep 22 pounds of propane handy. Add to that a watertight power port for shore power and a propane generator for when I’m completely off-grid. Basically, I can charge and recharge anywhere, whether I’m parked at a national forest or a rest stop.
But it’s not just about having power—it’s about having a reliable setup. I’ll show you everything I have installed, how it’s wired together, and even some DIY tips for making your system safe and efficient. Ready to get wired? Let’s go.
Solar Power: Tilt, Capture, and Maximize
Let’s start with my solar setup. I opted for tilting panels to maximize efficiency. Using steel eyebolts mounted on my awning brackets, I created a pivot point for three 100-watt solar panels connected into one large unit. If I could redo it, I’d just get a single 300-watt panel, but hey, live and learn!
The panels are mounted on steel conduits wrapped in black gaffer’s tape to prevent rusting, and I added caps to keep water out. The best part? I can prop the panels up at an angle to catch the sun as it sets. This little hack gives me way more wattage throughout the day.
The wiring runs cleanly from the panels, through my rear hatch, and into my Blueetti AC200 Max power station. It’s covered in waterproof tape, and surprisingly, no leaks!
Managing Power in the Van
Let’s dive into the heart of my setup: the Blueetti power station. It’s the lifeline for everything, from my DC-powered fridge and fan to my AC-powered microwave and air fryer. The station connects to a 12-volt fuse panel, which powers multiple circuits for all my 12-volt devices. A pure sine-wave Renogy inverter lets me charge the power station using my car battery while driving.
To avoid overloading my alternator, I added a 200-amp circuit breaker between the inverter and the car’s starter battery. Still, I only use this setup sparingly since pushing it too hard can damage the starter battery. In the future, I’ll likely upgrade to a high-output alternator for more reliability.
Backup Plans: Generator and Shore Power
When solar isn’t enough, I turn to my portable 2,200-watt propane generator. It fits neatly in my cargo carrier, runs quietly, and can fully charge my power station in about 90 minutes. I also installed a watertight power port in the rear hatch for easy connection to shore power or the generator.
This dual-fuel generator can run on propane or gasoline, but I stick to propane since I carry two lightweight, squatty tanks. It’s a real game-changer for extended camping trips.
Wiring Like a Pro
Let’s talk about wiring, because getting it right is crucial. Everything in my van is connected to the fuse panel for protection and organization. Here are three tips I’ve learned:
- Easy Access Is Key: Make sure your fuse panel and connections are easy to reach. I mounted mine just inside the driver-side sliding door. No more unloading half the van to troubleshoot.
- Label Everything: Trust me, you’ll thank yourself later. Label both ends of every wire to avoid a tangled mess. A thermal label maker is a cheap but invaluable tool.
- Use the Right Tools: Invest in proper wire strippers, crimpers, and heat-shrink tubing for safe and durable connections.
When wiring a new device, like my travel router, I follow a simple process: strip the wire, crimp on a connector, and heat-shrink it for insulation. It’s quick and easy when you have the right tools.
Lessons Learned
Not everything goes smoothly, and I’ve learned plenty from trial and error. On one trip, my Bluetti stopped charging because of a loose cable on the external AC adapter. It took me 30-45 minutes every time I needed to troubleshoot because I had to move all the gear out of the way. The fix? Don’t mount external adapters in hard-to-reach places. My new power station has the adapter built-in, saving me from future headaches.
Another hard-earned lesson: plan for heat. My fridge and freezer overheated during a summer trip, forcing me to troubleshoot in 105°F weather. Proper ventilation and efficient wiring are non-negotiable in a small space like this.
Wrapping It Up
Powering a tech-packed minivan isn’t easy, but with the right setup, it’s totally doable. From solar panels to generators and everything in between, my system is built to handle the demands of off-grid camping.
If you’re building your own system, take it step by step, invest in quality components, and don’t forget to test everything in real-world conditions. And hey, if you learned something from this post, let me know! I’d love to hear about your adventures and setups.
Until next time, stay powered up!